Voice controlling your home w/ Raspberry Pi
In this post we will be controlling 433 MHz light switches using a ready-to-use voice controlling software and a modified fork of a 433 MHz transmitter software, all on the Raspberry Pi. Basically I used a ready-to-use voice controlling software called Voicecommand, in which you can assign keywords and commands and assign what the software will do when heard those commands. In this case I assigned shell scripts to the voice commands – which executes the program to send 433 Mhz codes, give voice feedback to what exactly what action it performes and also send notification to XBMC – which pops up on the top of the monitor to even notify you of the action in text. To use the 433 Mhz transmitter with the Raspberry Pi I needed a 433 Mhz transmitter library or software, or else it would be too time consuming to finish this project. I found something called RCSwitch-Pi which seemed like a good program. Unfortunately I didn’t get it to work with my specific switches, so I modified the source code to make it work to my needs. I changed it so it only needs the Unit Code values to my switches. So now you don’t have to spend hours trying to understand the source code and the programming language and having to modify it yourself!
A demonstration of all explained is shown in the video below.
)
Hardware requirements
- Raspberry Pi with a working internet connection
- USB Microphone – I use a MONACOR DM-500USB
- 433 MHz radio transmitter – I used a TX433N
- 433Mhz switches – I used wall outlet 433 MHz receiver switches
- 3,5mm speakers or TV connected by HDMI for sound output
Installing dependencies
First of all root login to your Raspberry Pi, and keep root-logged during the entire guide. This is important or else the software won’t work.
If you don’t have the Git client installed yet. you need to run this command. Git is used to download all the necessary software and configuration to make anything at all work.
apt-get update
apt-get install git -y
First you have to install the WiringPi library. WiringPi is used to be able to send and receive data through the GPIO pins using high-level languages like shell or python.
These commands are taken from: https://projects.drogon.net/raspberry-pi/wiringpi/download-and-install/
cd ~/
git clone git://git.drogon.net/wiringPi
cd wiringPi
./build
Now we need to tweak the audio settings. Here is what you need to run to automatically enable the audio capabilities at boot, this way you don’t have to manually enable the audio module each time you reboot to make the audio in the software to work:
apt-get update
apt-get dist-upgrade -y
apt-get install alsa-utils mpg321 lame –y
then edit /etc/modules (nano /etc/modules) and paste this into the bottom of the file:
snd_bcm2835
Now reboot your Raspberry Pi.
When it’s booted run this to make 3,5mm the default output
sudo amixer cset numid=3 1
sudo alsactl store
or run this to make HDMI the default output
sudo amixer cset numid=3 2
sudo alsactl store
Installing the voice control software
Now lets start downloading the voice controlling software.
This voice controlling software we are going to use is made by Steven Hickson. Instructions regarding installing his software is from his blog;
These commands will install the software and open up a configuration for the software.
cd ~/
git clone git://github.com/StevenHickson/PiAUISuite.git
cd PiAUISuite/Install/
./InstallAUISuite.sh
Download my shell scripts and config which is used to make the voice controlling software talk to the 433MHz software.
cd ~/
git clone https://github.com/PrinceBalabis/RaspberryPi
now run:
sudo cp RaspberryPi/voicecontrol2/defaultcommands.conf .commands.conf
to add my settings to the voice controller config.
Customizing voice controlling settings
To edit the voice controlling software settings run:
sudo voicecommand -e
Customize it to your needs, for more information about these settings, go to http://stevenhickson.blogspot.se and read the voice controlling software posts.
To test if the USB microphone is working you can run a speech-recog software that the voice controlling software use for speech-to-text.
cd ~/PiAUISuite/VoiceCommand
pkill -9 arecord
speech-recog.sh
If it’s not repeating back what you said with text, something is wrong with your microphone settings.
Connecting the 433 MHz transmitter
Here is the datasheet for my 433 MHz RT: http://www.velleman.eu/downloads/7/tx433n_datasheet.pdf
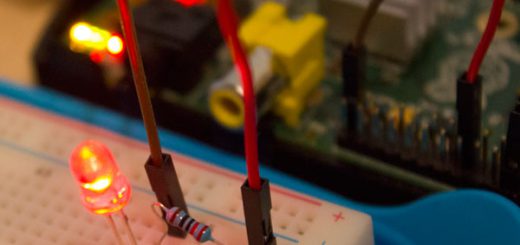
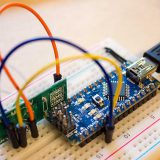
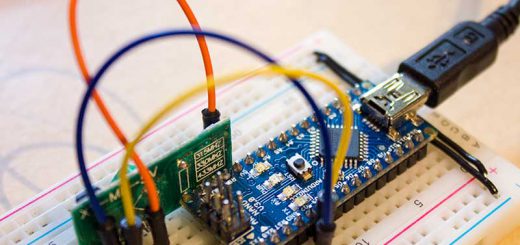
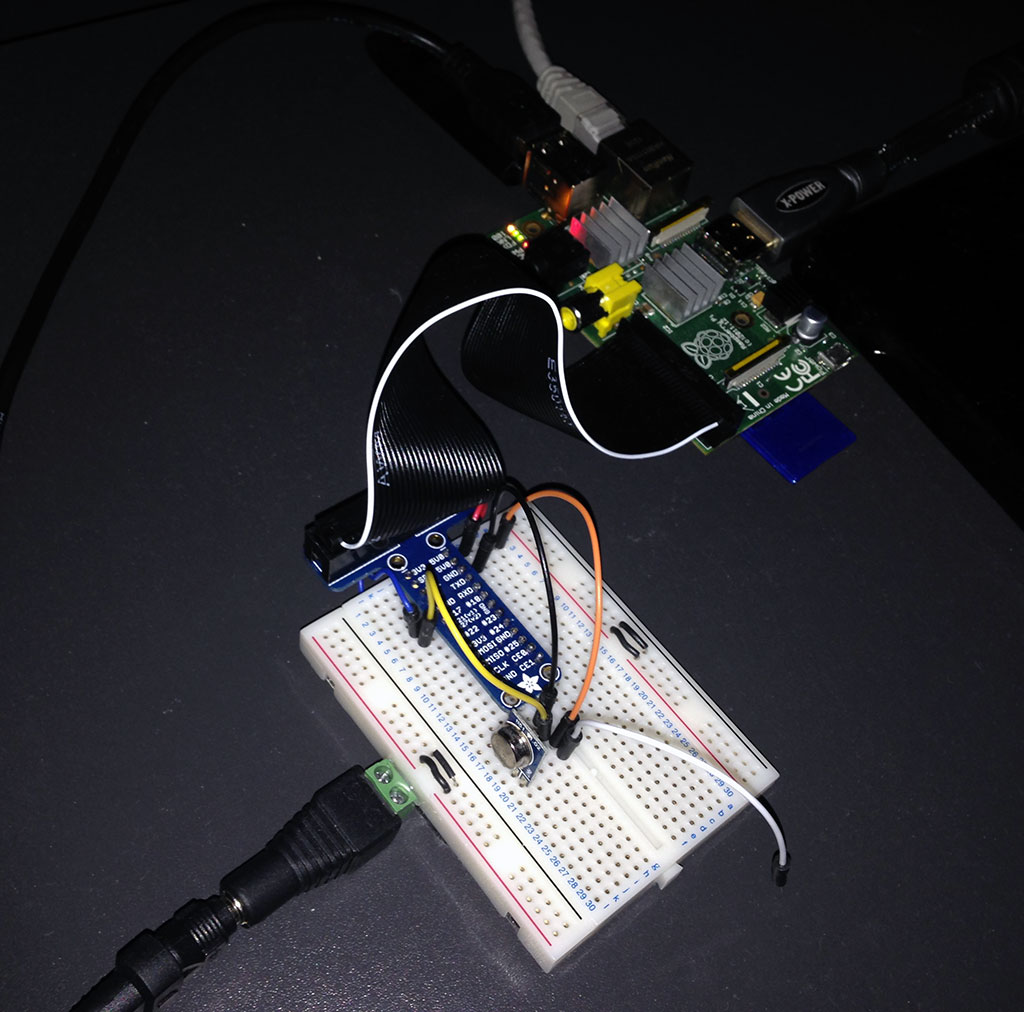
The input pin on the 433 MHz transmitter should connect to GPIO pin 17/0 on the raspberry Pi(in my case it was pin 2)
Here is a bad picture of the connection. I’m using a breakout kit and a breadboard. Also I’m running the Pi from the GPIO pins, for a more stable overclock than running USB-power.
For the next step you are going to need get your Unit Code Values for your 433 MHz switches. These are the codes specifically set for each group and channel. We won’t go over how to get these in this tutorial, but if you don’t know them, either Google your 433 MHz switches for it’s unit codes, find it’s datasheet, or do what I did; use a 433 MHz receiver and listen and record for the unit code values when you press the buttons on the RT remote.
I wrote tutorials on how to get the unit code values, either using a Raspberry Pi, or Arduino:
Raspberry Pi tutorial: http://www.princetronics.com/?p=596
Arduino Tutorial: http://www.princetronics.com/?p=561
My switches: http://www.kjell.com/.mvc/Document/File?id=0800bd2c-4d5b-4c03-9b38-a2a800a98698
Some of the unit code values for my 433 MHz switches are:
[table caption=”433 MHz switches codes” width=”400″ align=”center”]
Group,Channel,On,Off
4,1,5510485,5510484
4,3,5525845,5525844
[/table]
Now test if the 433MHz transmitter works by running the command
~/RaspberryPi/433mhz/send {UNIT CODE VALUE HERE}
Where {UNIT CODE VALUE HERE} is the unit code value of the group and channel of the switch.
Example usage to turn on my Group 4 Channel 1 switch:
~/RaspberryPi/433mhz/send 5510485
to turn it off again I run
~/RaspberryPi/433mhz/send 5510484
To make sure the voice controlling software uses your Unit Code Values. cd into ~/RaspberryPi/voicecontrol2 to find the example shell scripts(.sh) that the voice controlling software is currently using.
Just nano into the .sh-files and change the Unit Code Values to the ones your switches are using – and also they already contain code to display the top GUI notifications on XBMC – remove them if you don’t have XBMC running or don’t want it.
To customize when these shell scripts are used by the voice controlling software run this to get into its settings
sudo voicecommand -e
Now when we know the transmitter works, it’s time to see if it works with the voice controlling software.
Voice controlling usage
To start the voice controlling software run
pkill -9 arecord
voicecommand
Now it keeps listens for the keyword ‘pi’. When you say ‘pi’ and it manage to pick it up, it should say ‘Yes sir?’. Thats your queue to say the voice command.
My voice commands:
[table width=”500″ align=”center”]
Command,Action
Hi,just says ‘hello’ back
Walls on,Turns on two switches which is connected to two of my wall paintings
Walls off,Does the thing said above except it turns them off instead
Bar on,Turns on one switch which is connected to the bar-lights
Walls on,Turns off one switch which is connected to the bar-lights
Light off,Turns off all switches
Lights on,Turns on all switches
[/table]
To make the software autostart on boot run
sudo cp ~/RaspberryPi/voicecontrol2/voicecommand /etc/init.d/voicecommand
sudo chmod 755 /etc/init.d/voicecommand
sudo update-rc.d voicecommand defaults 100
To remove the autostarting feature run
sudo update-rc.d -f voicecommand remove
sudo rm /etc/init.d/voicecommand
Extra: Text To Speech usage
To use text to speech, which is something you can use in the voice controlling config you run
tts ‘{COMMAND}’ 2>/dev/null
Where {COMMAND} is the text you want to convert to speech and outputted through audio.
Here is an example of this command, where the point is to say ‘hello world’ through your audio output.
tts ‘hello world’ 2>/dev/null
If you have any questions feel free to ask me by using the Contact page or by commenting below.